1.Create the Tree Foundation
First, roughly create the tree path with Pen Tool and fill it with (green-darker green) gradient. Go to Effect > Distort & Transform > Roughen

Roughen Options
When the Roughen options window popup, enter the following values: Size: 5%, Detail:100/in and select Points=Corner, then click OK.

2.Create the Art Brush
Now we need to make a New Art Brush for the tree branches. With the Pen Tool, make a path as shown below(1), fill with dark green, and apply the same Roughen effect as the previous step. Your path now should look like path(2). Duplicate path(2) by ALT+Drag or Copy & Paste, vertically scale it down a bit, and change it to lighter tone of green(3). Repeat this step, duplicate one more path and fill it with a even lighter tone of green(4).

New Art Brush
Select these 3 paths and drag it to the Brushes Library to make a New Art Brush.

Art Brush Options
Leave everything as default, but select Tints and Shades from the Colorization Method drop down menu.

3.Tree Branches
With the Pen Tool, create some wavily stroke paths and fill stroke color with green. Then apply these paths with the Art Brush you’ve created in the previous step. Adjust theOpacity between 40-50% so it blends with the tree. If you want bigger tree branches, apply thicker stroke weight, thinner stroke = smaller branches. Play around with theOpacity and Stroke Weight and try to make the tree looks as natural as possible.

4.Christmas Balls
Create various size and gradient Christmas balls with the Ellipse Tool. Place some on top of the tree, send some to the back, and put some behind the branches.

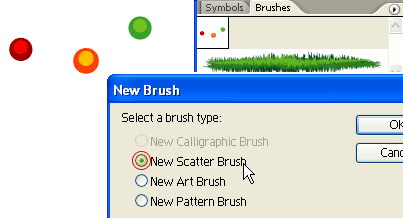
5.Light Bulbs
The tree still looks too plain, we need some more decorative lights. Create some light bulbs as shown on the left, drag it to the Brushes Library to make a New Scatter Brush.
Scatter Brush Options
When the Scatter Brush Options window popup, select Random for all options and enter the range values as shown below.

6.Tree Lights
With the Pen Tool, roughly draw a zig zag path from the top to bottom, and apply theScatter Brush you’ve created in the previous step. Notice how the light bulbs are randomly rendered base on the range values you’ve entered in the Scatter Brush Options, and you can change these setting at any time by double click on the Library object. If you want to have more lights, create another path and apply the same Scatter Brush.

Final
Download the source file now and see how it is done!

No comments:
Post a Comment